JS: Setting up the environment
Theory: NPM
Installing Node.js adds not only an interpreter but also several important utilities for working with JavaScript projects. Among them is the npm (node package manager) utility. It allows to work with any Javascript project as an npm package.
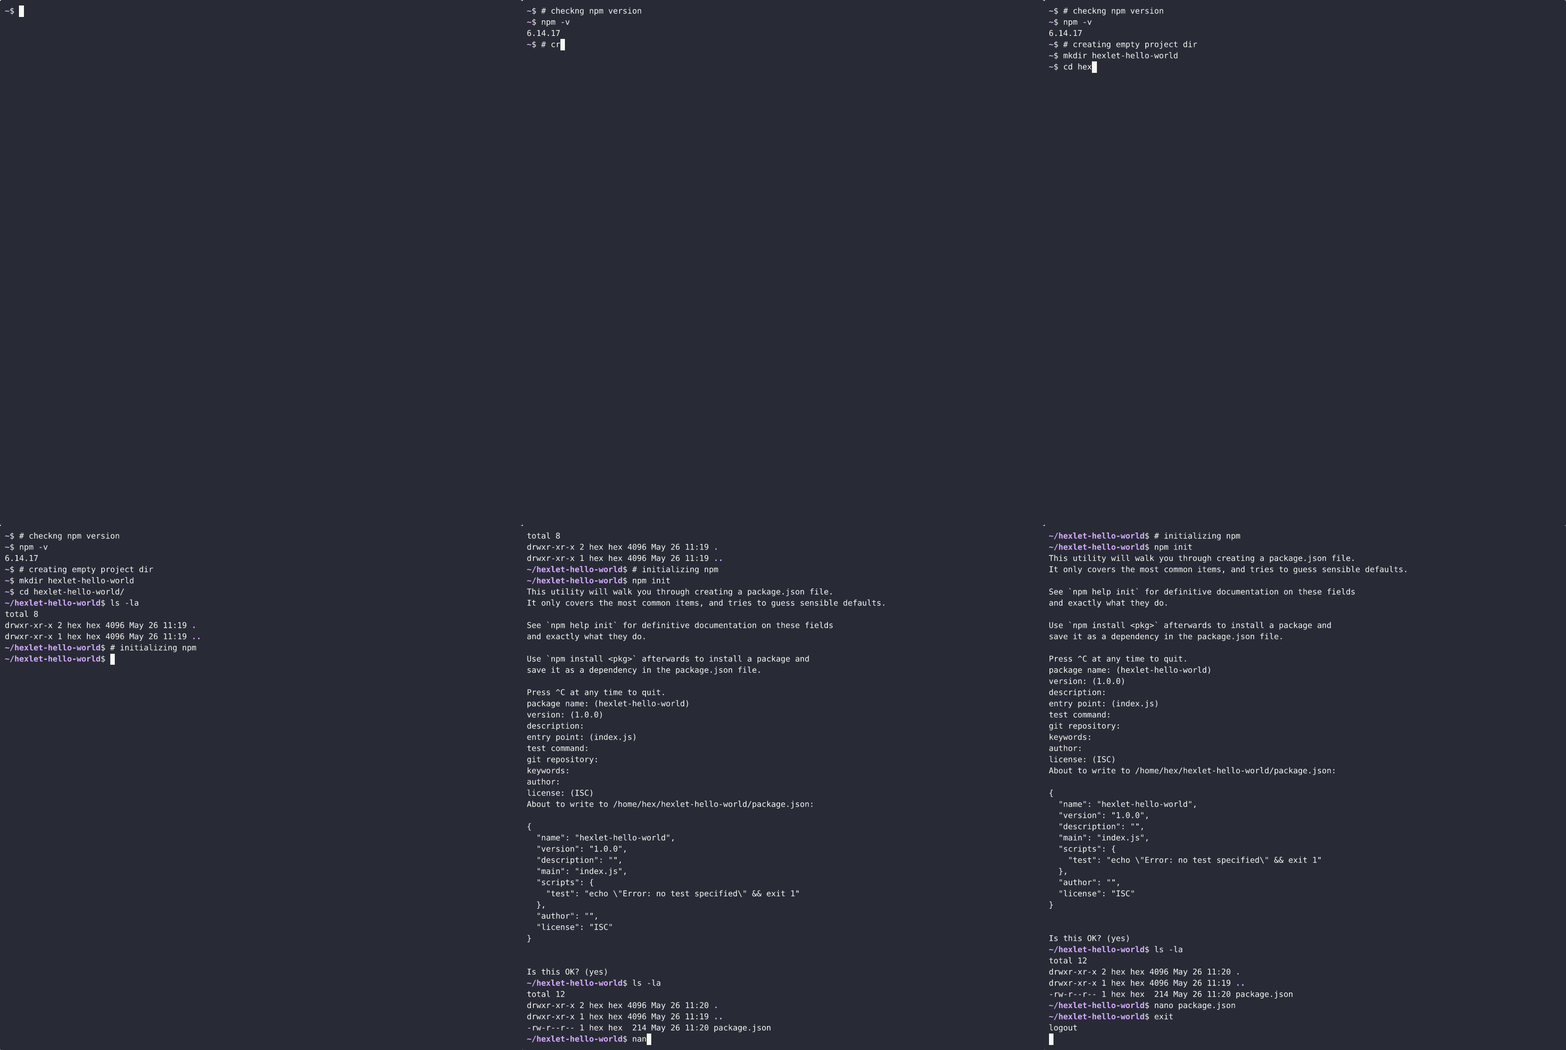
npm performs many important tasks, which we'll get to know during the course. Currently, we're interested in its basic use – the creation (initialization) of a new project. A project is defined as code for an application, such as a website.
To create a new project, you need to do two things:
- Create a project directory – a place where all files with code will be located. This directory is called the project root.
- Run the
npm initcommand in the project root.
During the initialization process, npm will ask a few questions about what the project should be called, what version it should be, its description, etc. All these questions you can safely skip, you'll always have the chance to change the answers.
In the end, npm will ask if everything is correct and show the contents of the package.json file, which will be the basis of the new project. If your answer is yes, the file will be written to disk and the project will be considered ready for work.
package.json is a text file that stores data in JSON format. This format allows you to describe data as key-value pairs, where the value can be JSON itself. In the example above, it's the value of the scripts key.
Note the "type" key in JSON above. You need to add this part yourself by editing the file. It's needed in order for the import system to work.
After the initialization process is complete, you can get down to the most important thing, writing code. By default, the code is created inside the index.js file in the project root (where the package.json file has been created). This does not mean that the entire package consists of a single file. You can create as many code files as you want, but the main thing is that most of the work is done inside index.js, where the code is imported from the other files.
Recommended programs
Completed
0 / 9


