Content layout fundamentals
Theory: Gradients
Color is a powerful tool to express meaning when creating websites. By adding color to your layout, you can evoke a certain mood or feeling, help users quickly find the right piece of information, etc. You already know how to set the color, of the text using the color property, and how to create a background using the background property. But until now, we’ve only used monotone colors, i.e., the property only uses one color.
To make a piece of content stand out, you can add a mix of colors that blend into each other instead of using one color. This is what we call a gradient, a space consisting of several colors that flow smoothly into each via intermediate colors. Of course, it’s not always a "smooth" transition, but usually, this is the case. Look at this example of a gradient that goes from orange to yellow.
See example at CodePen.
In web design, gradients are used to create backing for elements, such as product cards and the first blocks, etc.
See example at CodePen.
Let’s look at how both gradients are created. The first option is a transition of two colors, which is created using the linear-gradient() function. The function creates, as the name suggests, a linear gradient. Linear means that the colors go from one to the other along a straight line. This is what the transition from orange to yellow looks like from the first example:
It’s worth explaining right away that gradients are set in the background-image property, but to save space, we’ll write all the examples in the generalized background property. You can use any of the other properties when using gradients, such as background-size.
What the linear-gradient() function consists of:
- Gradient direction. In the example above, the direction isn’t specified, which means that the gradient will go from top to bottom
- Colors that are used in the gradient
The number of colors that can be used in a gradient is limited only by your imagination. You could have 2, 3, 4, 5 or 6 colors. Designers don’t usually use too many colors at once so as not to turn the block into a mishmash that confuses the content behind it. As an example, we’ll create a gradient using four colors.
See example at CodePen.
It’s not the prettiest. Try not to overload the page with colors. Two or three colors are usually enough to use as backing for elements. The closer they are to each other in tone, the smoother the transition will be.
Let’s consider a second example with a product card:
Here we can see a gradient angle of 45 degrees for the first time. This value determines how the gradient will travel. If you don’t explicitly specify an angle, then the default is 180 degrees.
Here is an example of some of the angles that can occur in practice.
See example at CodePen.
The example uses a gradient of green to blue. It’s important to keep this in mind to see how the angle affects the background filling process.
Let’s go back to the card gradient example:
Gradient stop points
If we look at the angle of the color fill, you can see a certain construction: #color percent. What does the percentage mean? In order to better understand this, let’s create the following.
See example at CodePen.
There’s a clear question we can ask: "What’s going on here? And why are 4 backgrounds created using one property?" Let’s break it down in order!
The colors in the gradients are allocated automatically. If you specify three colors for the gradient, the browser will evenly distribute all the colors over the area of the block, about 33.3% for each color. This space distribution is rarely used in a design, as there are both main and complementary colors. The main color, as the name implies, takes up more space than the others, and CSS allows you to specify in what proportions the color should be distributed within the block.
The percentages after the color indicate the stopping point or color stop, that is, the points at which the beginning and end of the color in the gradient occurs, for example, #03001e 0%, #03001e 25% indicates that color #03001e has two stopping points: at the beginning of the gradient and upon reaching 25% of the gradient length.
Next part of the entry: #7303c0 25%, #7303c0 50%. Note that color #7303c0 starts at the same position where the previous color ended. This creates a sharp transition of colors without mixing. This example clearly shows how gradient stopping points are created, which means we can go back to the previous example:
#4158d0— appears at the beginning of the gradient and smoothly passes to the next color#c850c0— appears almost halfway along the gradient and passes to the next color#ffcc70— the last one appears almost at the end of the gradient
You can see specific transition points if you set start and end stop points for each color:
See example at CodePen.
By the way, this effect is also often used on sites :)
To reduce the amount of code, you can make use of the fact that 0% and 100% will be the default values for the first and last color, respectively. After all, the gradient starts at the zero point and ends at the last point. The code from the last example is generalized as follows:
Using linear gradients, developers can create so-called “patterns” – repeating images that can be linked together. For example, you can use gradients to create alternating stripes.
See example at CodePen.
What happens in this gradient? It is specified as follows using repeating-linear-gradient():
In this example, the gradient is set to occupy 20% of the entire block width. If you use linear-gradient() anything greater than 20% of the block size will become one color, specifically orange, since it’s entered last.repeating-linear-gradient() will instead repeat the entire gradient as long as there is room in the block. This is useful if you want to create a repeating gradient.
When you create more complex patterns, you can use pixels instead of percentages. This will help to clearly indicate the size of each color within the block.
See example at CodePen.
Radial gradient
As the name implies, a radial gradient creates a circle with a center as the beginning of the gradient. Create a radial gradient with two colors. The radial-gradient() function is used for this:
See example at CodePen.
As you can guess, it makes no sense to use angles for a radial gradient. Instead, this type of gradient has two options available, which you can set before the colors:
- Shape:
circleorellipse. By default, the radial gradient has anellipseshape - Size:
farthest-corner— The gradient extends to the farthest corner of the block. This is the default valueclosest-side— The gradient extends to the nearest block boundaryclosest-corner— The gradient extends to the nearest cornerfarthest-side— The gradient extends to the farthest block boundary
Descriptions can make it unclear what we’re talking about, so it’s worth looking at examples. Let’s start with the shape of the gradient.
See example at CodePen.
And now the dimensions. See at example.
Note that it’s not that easy to find the differences. It’s important to know all of this is possible in CSS, but don’t try to learn and figure it all out at once. In most cases, you’ll use fairly simple tools and go back to the documentation and specifications as needed. Another way to learn is to look at third-party code. Get in the habit of reviewing the code of all the elements you like the look of. Study how they are laid out and try them yourself - this approach will help you bump up your layout skills quickly.
As with linear gradients, radial gradients allow you to work with stopping points:
See example at CodePen.
Selecting colors for a gradient
Color matching is no easier a subject than reproducing a gradient using CSS. In order to combine colors correctly, artists and designers take entire courses. We don’t really need to worry about the intricacies, but we’ll study the basics in this section.
The topic of color combination is important for more than just creating gradients; it occurs all the way through any frontend developer’s career. In a situation where you need to get a page done quickly, and you don’t have a designer on hand, being able to choose colors is a good skill to have in your portfolio.
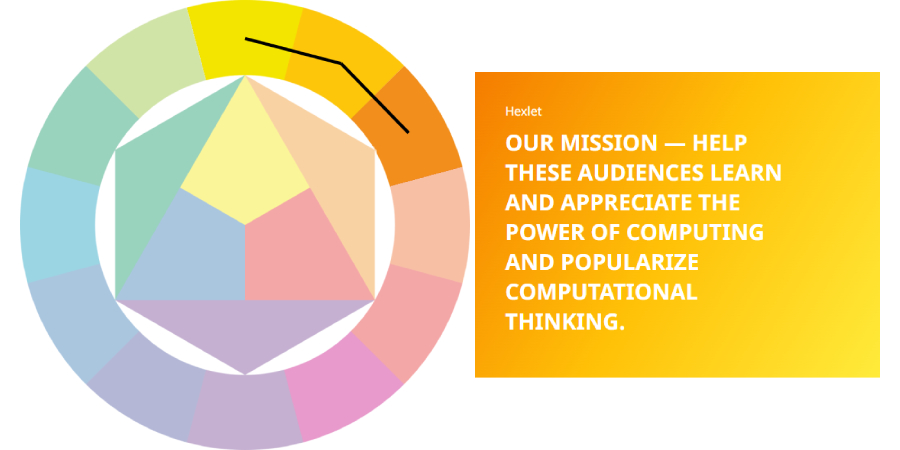
For color matching, we use the «Itten Circle», named after the 20th-century Swiss artist Johannes Itten. As a theorist, he invented a circle to identify «related» colors.
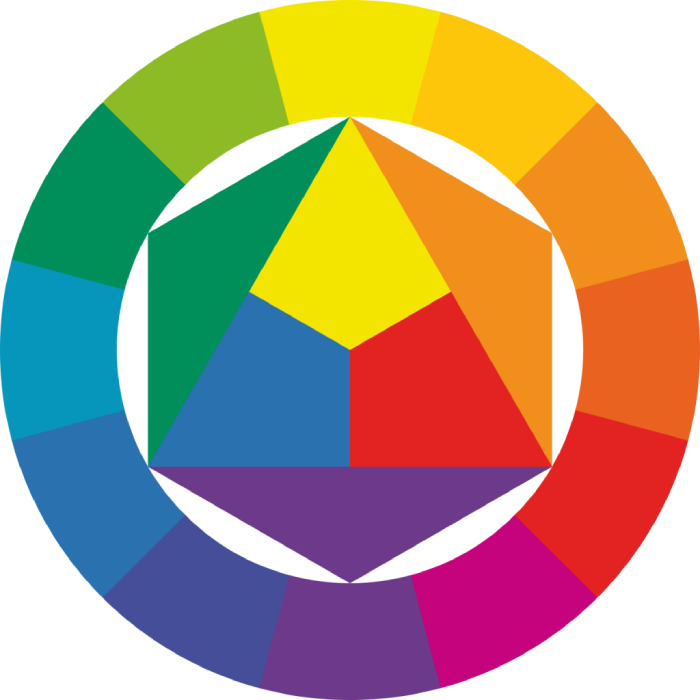
The circle covers several concepts, such as primary, secondary, and tertiary colors, but we’re interested in approaches for choosing color combinations:
- Complementary color combination
- Triad
- Contrast triad
- Analog triad
Let’s look at color combinations using small blocks and gradients as an example. The important thing is that the colors won’t match one-to-one, in fact, they shouldn’t. The circle allows you to get a feel for the reference points, and then you can change the tone and saturation of the color.
Try to find a balance when using colors. One color usually acts as the main one and dominates the component, while the others only provide accents. Accents can be any color if the component/site background is neutral
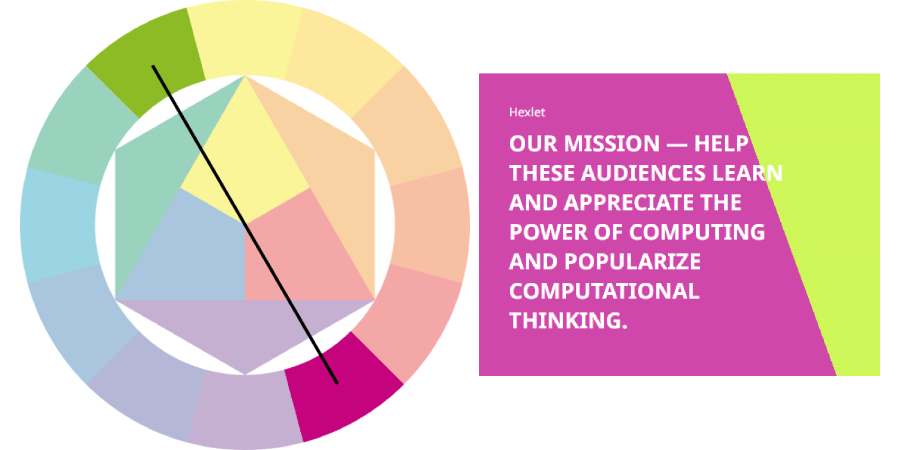
Complementary color combination
Complementary colors are those on the opposite side of the circle from each other. Choosing colors like this allows you to create contrast between elements. Usually, a complementary combination is used when accentuating small areas. This approach can be used for pop-up messages, buttons, and so on.
In gradients, this approach is used for a sharp transition or just as a visual effect. But don’t get carried away – sharp contrasts in large quantities can be irritating
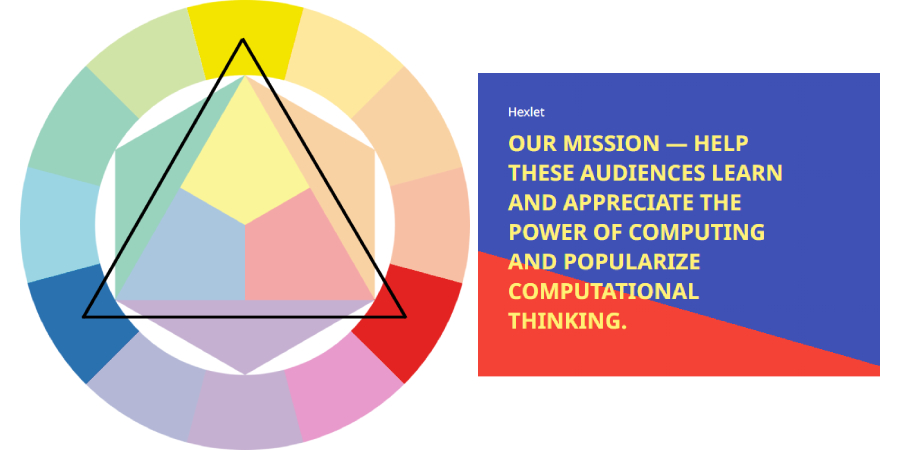
Triad
A combination of contrast and balance. All the colors will go well together in any order. On the circle, it looks like an equilateral triangle.
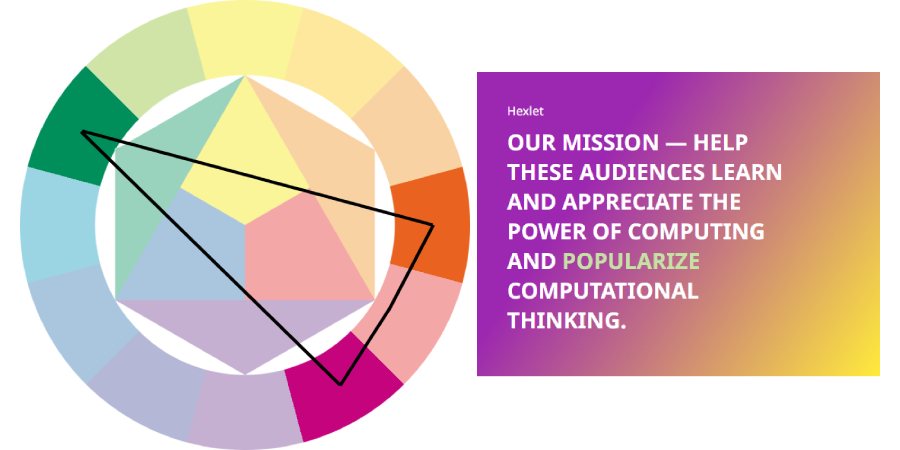
Contrast triad
Another type of triangle is slightly narrower than the usual triad. This approach is closer to that of complementary color combinations. To make it, a straight line is drawn across the whole circle, but two adjacent colors are taken from one side. Here, as is the case with the standard triad, there is a balance of contrast and balance
Analog triad
This is one of the most common triad options for creating gradients. Unlike the other triads, it takes three neighboring colors. Since the colors in this triad can be very close to each other, it’s worth being careful to ensure that the contrast between the background and the text is sufficient for it to be easy to read.
Recommended programs
Completed
0 / 17

