Modern layout fundamentals
Theory: Publication on the Internet
Every project, in due time, will reach the point where it's time to publish it for everyone to have access to it (specifically, on the Internet). This may be because you've finished the project or want to test it on different devices. In any case, as artists say, you should not do an idle work, you must show your projects.
To upload your project on the Internet, you need a host - a special server that will store your files and provide access to them through a special domain name (for example, right now, you're on a site with the domain name hexlet.io).
In this lesson, we'll look at the free GitHub hosting service you can use to put your layout online. Since we now have some simple pages created using HTML and CSS, we'll need hosting for static websites. These sites don't use the complex logic associated with databases and programming languages that run on a server. So, we just need a server to store our files and open them on demand.
In essence, the server will do everything that your computer did when you created the layout on it:
- The operating system will query the hard disk or RAM
- The hard disk or RAM will give back the contents of the file that was queried
- Your browser will process the data it has received and display the result

Preparing the page
If you want to put a page on the internet, you need to create it first. So that we can focus on the placement process, our page will consist of one HTML file and one CSS file. Let's perform the following steps:
- Create a directory on your computer. This is the first part of the creation of any website. Always keep your work in different directories so that you can easily find or transfer it later
- In the directory that has been created, create the files index.html and style.css
- Link a CSS file to your HTML file. Don't forget to create a basic markup for the site
Create any markup you want. Don't be afraid to experiment with styles. Let your imagination run wild :) For example, it could be a little bit of information about you. I created just such a description, and it looks like this:
index.html inside the body tag
style.css
GitHub Pages
No matter what profession they study at Hexlet, students are sure to become familiar with git and its main incarnation, GitHub. You may have already heard of this code repository. It's an incredibly useful and convenient system, it's difficult to imagine modern development without it. For now, we're interested in the fact that GitHub allows you to host a static site for free. This is done using the GitHub Pages service.
Of course, you need to know the basics of Git to do the job, but even without them, we can upload the simple page we created in this lesson.
It's time to upload your page:
- Sign up for GitHub if you haven't already
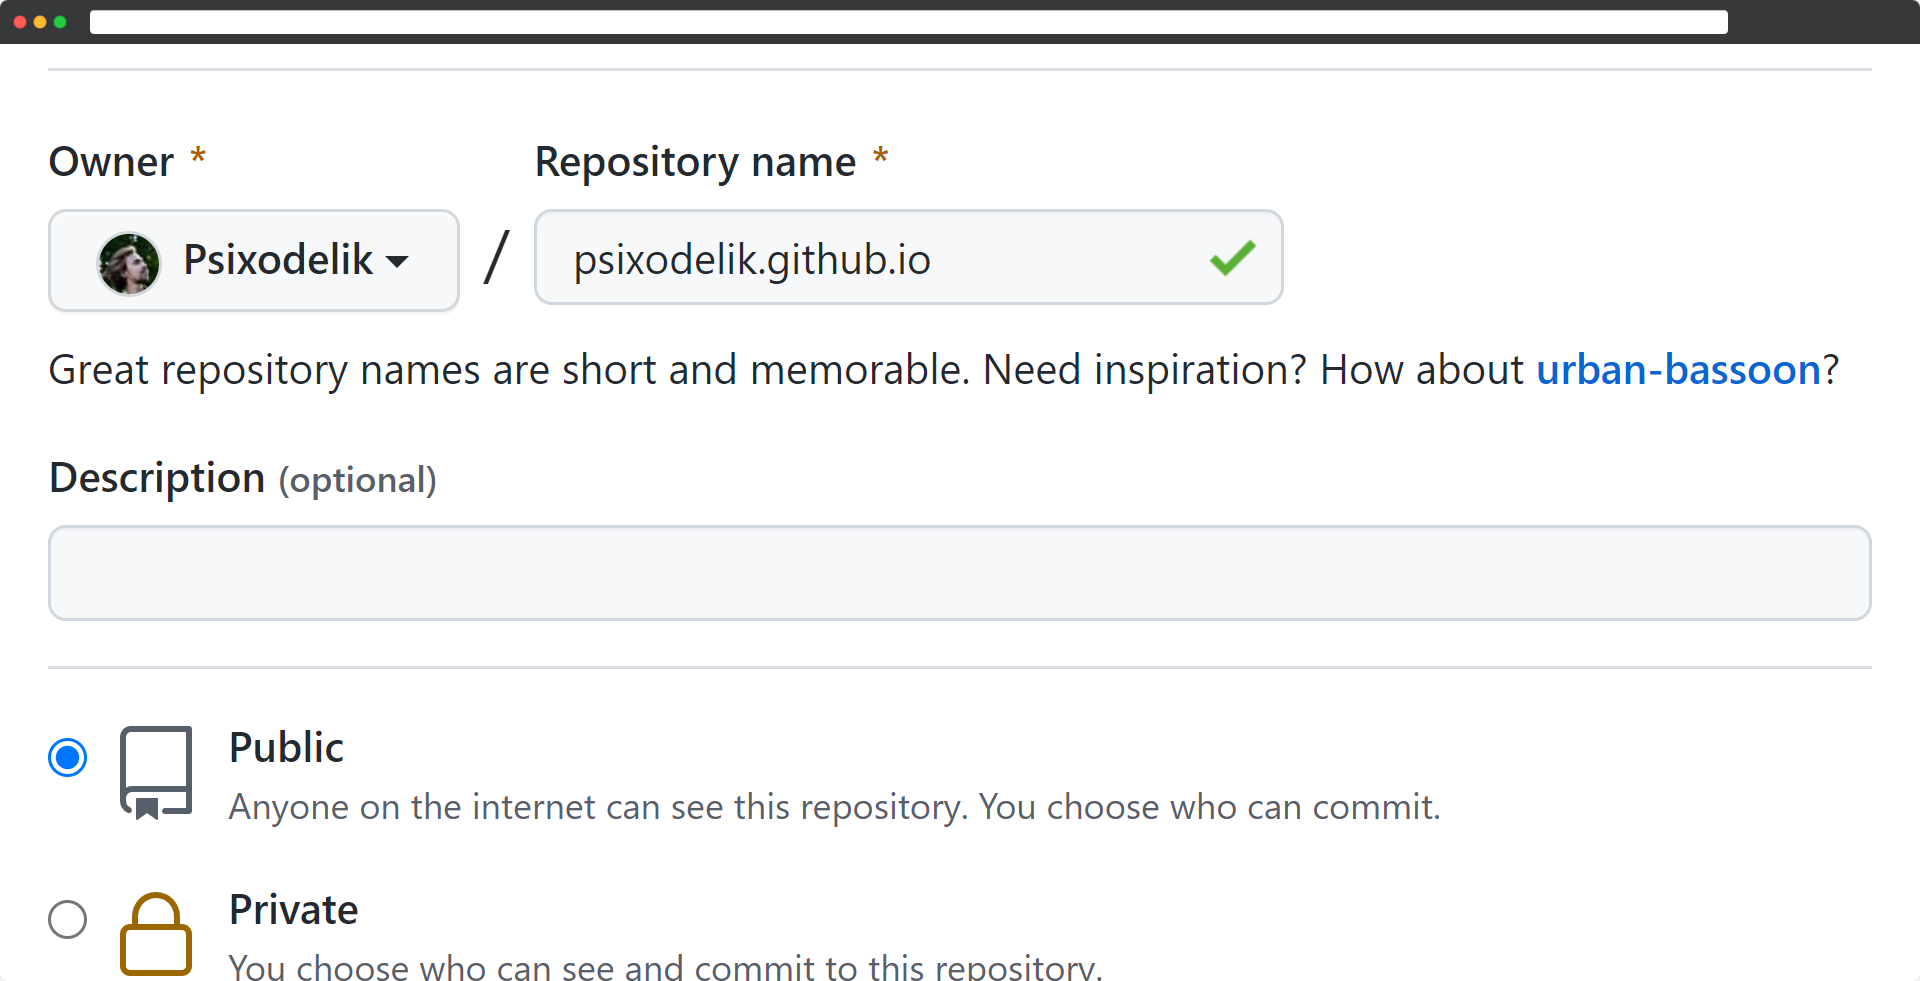
- Create a new repository. A repository is a place where your project code is stored. Use username.github.io as the repository name, where username is your username on GitHub

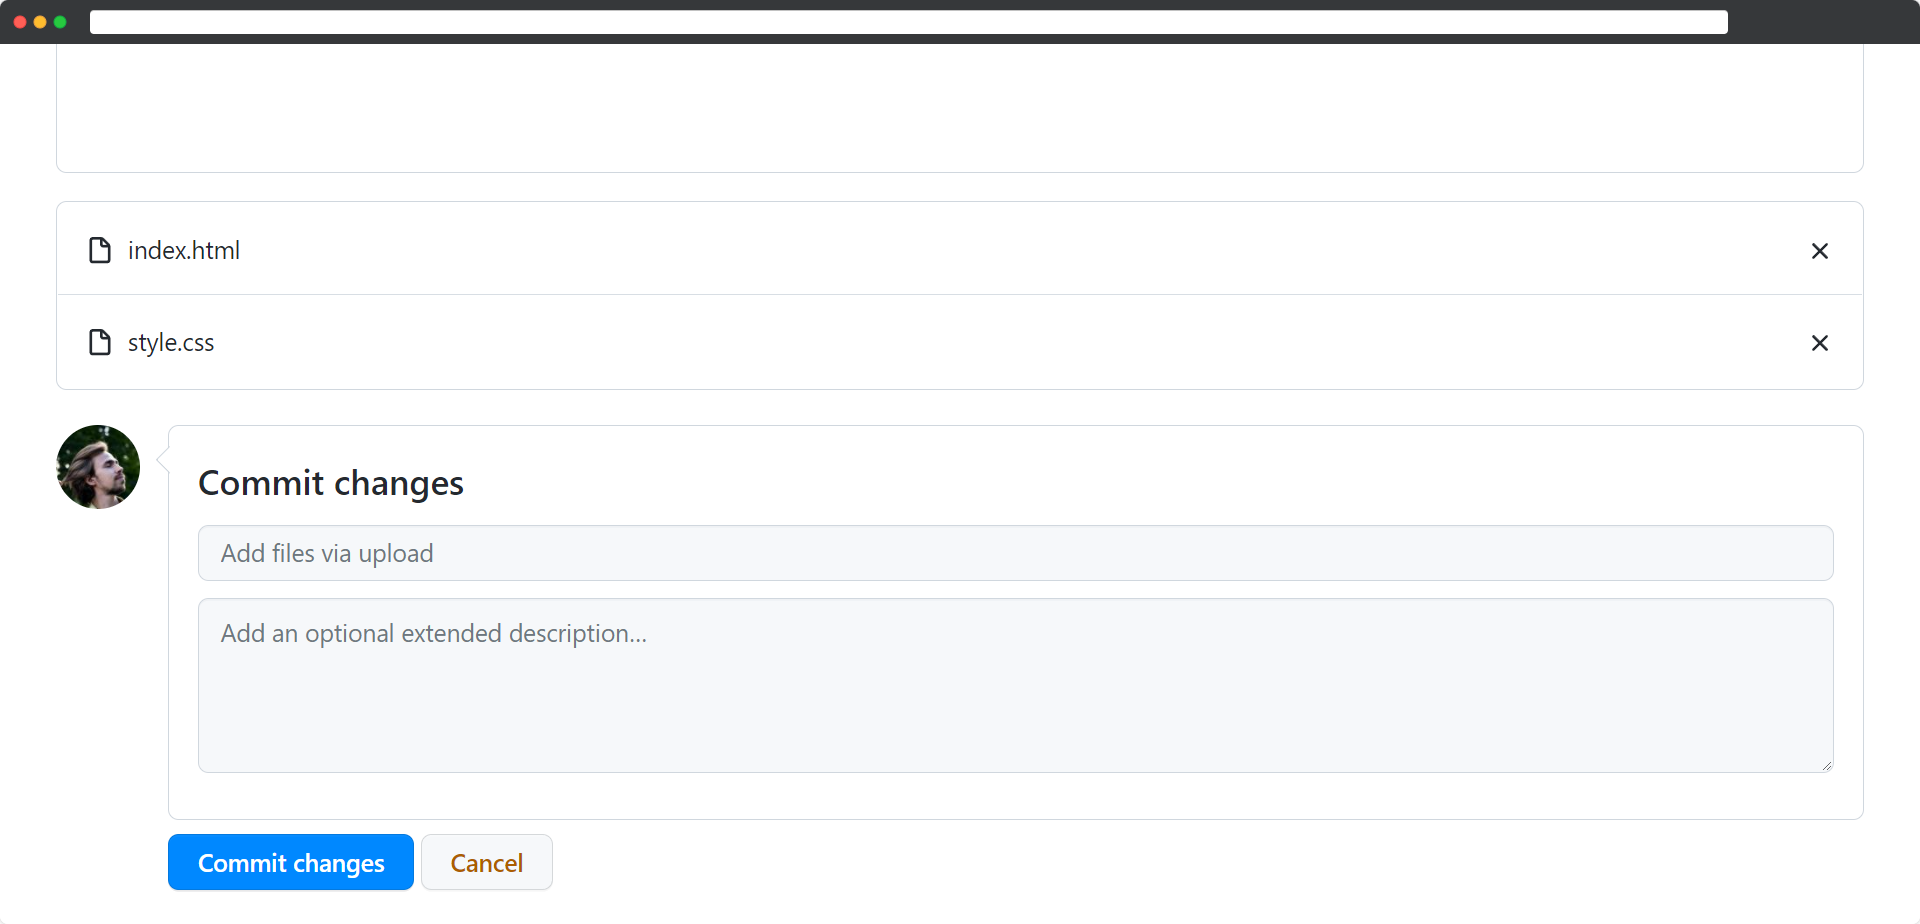
- Upload the index.html and style.css files you created to GitHub. You can do this by adding /upload/ to the URL of your repository page. You'll get a link that looks like https://github.com/username/username.github.io/upload/, where the username is your GitHub username. Once you've selected the files, click Commit changes

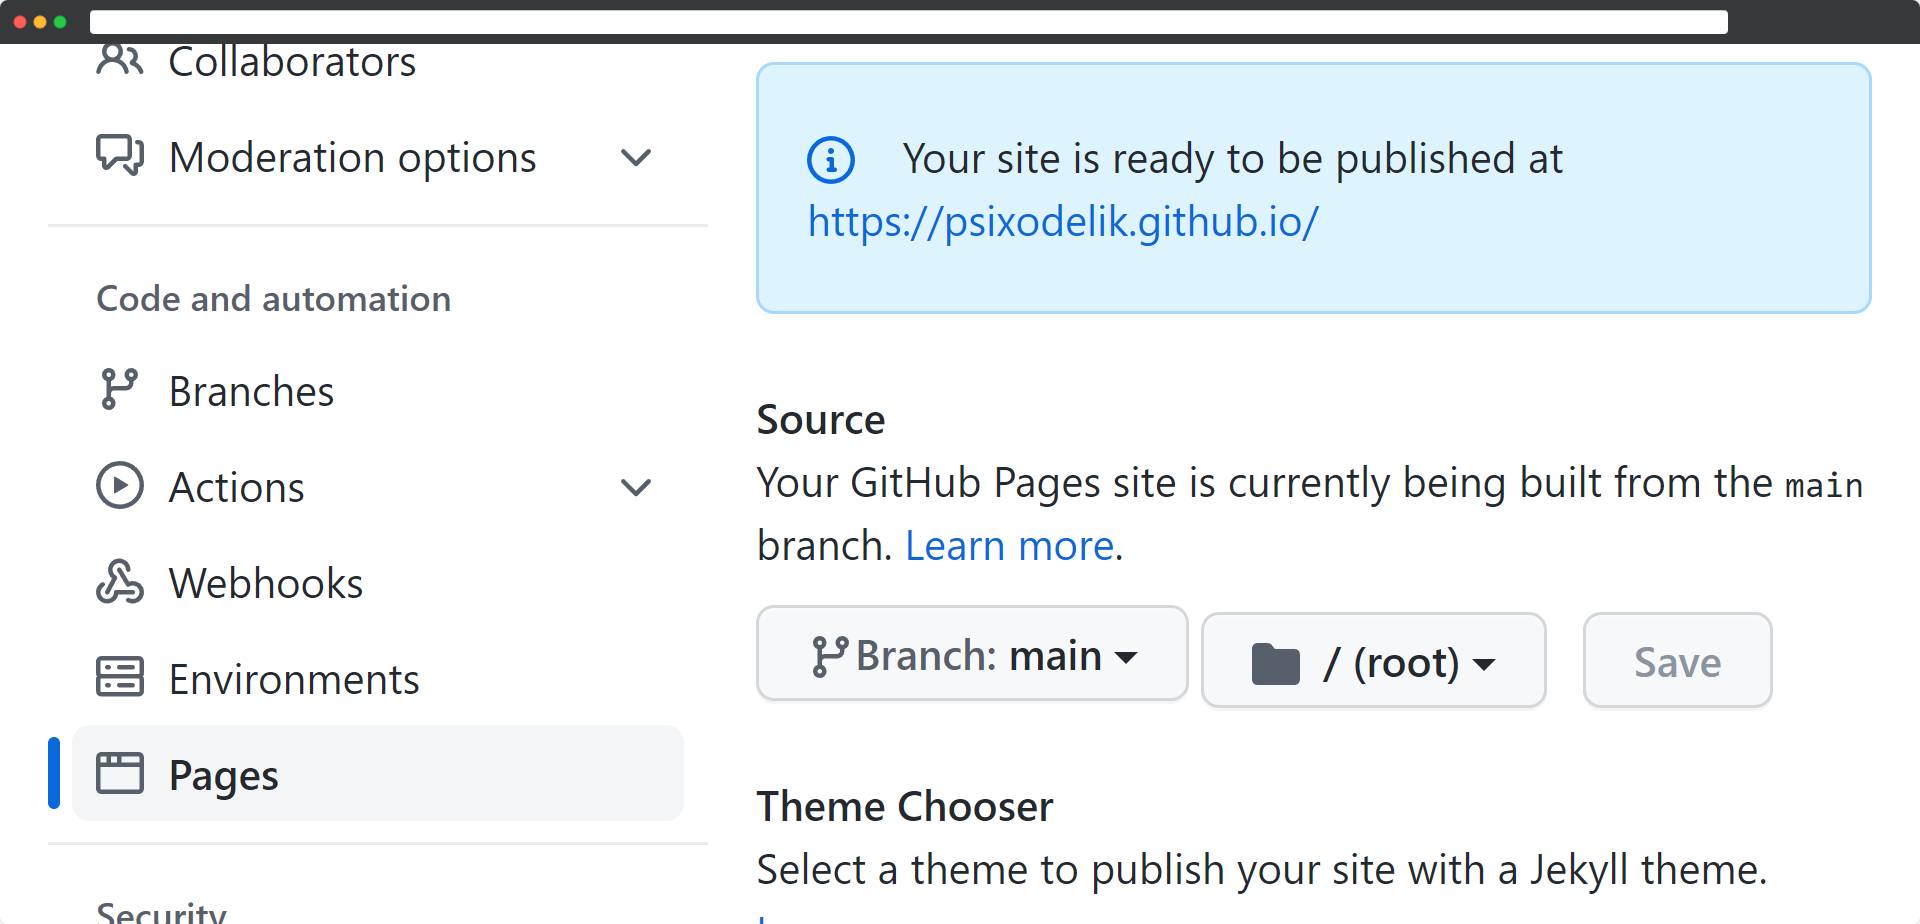
- Go to the repository settings. In the left menu, click the Pages tab. If you've done everything according to the instructions, GitHub will automatically activate the site at the specified link. If the name of the repository is different, you must select the main branch under Source

Done! Now you can look at your page by following the link that GitHub has given you
Recommended programs
Completed
0 / 12


