Modern layout fundamentals
Theory: Graphic editors
Studying markup development is not only about learning how to style elements, but also about physically designing layouts. In order to start making layouts, you have to see them and understand how to work with them.
There are several basic editors on the market. Some are specific to one operating system only, others work in browsers, and some can be installed on any system. Here are just a few of them:
- Adobe Photoshop. The oldest editor has been the standard for many years. It's starting to lose popularity because of how complex it is to use. Overloading it with different functions doesn't make it nicer; many functions are just not necessary for layout designers, but it's more than happy to eat up the device's memory. The editor is available on Microsoft Windows and macOS systems. There is currently no official version for Linux systems
- Gimp. An analog of Photoshop for Linux systems. It has similar functionality and can open some files in Photoshop format without issues. But don't expect it to be a full-fledged replacement. If a designer sends Photoshop sources, there's no guarantee that the file will open correctly in Gimp. Just like Photoshop, the Gimp is not a specialized tool for web designers, so many of the features it has just aren't necessary
- Sketch. A specialized editor for designing mobile and web interfaces. This is really useful because developers are especially focused on user-friendly design interfaces. There are a lot of advantages for layout designers: it's easy to view layouts, dimensions, indentations, and other information that will help when transferring layouts. The main disadvantage of the editor is that it only supports macOS. The developers are only really focused on working with macOS; the editor isn't expected to be ported to other operating systems
- Figma. An in-browser editor that allows you to view layouts in it from any device with a browser and internet access. If your coffee grinder has internet access, you can look at layouts using it too. This editor, like Sketch, is focused on creating interfaces, which makes it more convenient to work with. This is the editor used for projects and some tests where you're given a layout to design. It's also free for personal use
This is by no means an exhaustive list of editors that exist on the market. You may encounter other options while working, but don't worry. There is no need to learn each editor separately. Their interfaces and the way they work are often very similar, and if you learn how to work with one editor, you'll figure out how to work with others.
In this lesson, we'll look at the basics of how Figma works
Installation
As mentioned above, Figma does not require installation. It all works in your browser. All you have to do is go to figma.com and register.
In addition, it is possible to install a separate application. It's more a matter of convenience because instead of a tab, you'll get a separate window to work with the editor. The application is now available for Windows and macOS operating systems. You can download them from Figma's download page.
For Linux systems, there are special installation options for different types of systems. You can find them on GitHub.
Use whichever option you're comfortable with.
Working with the layout
In this section, we'll look at the basic steps when working with the editor as a layout designer. As an example, we'll use the Hero Section test pattern from the CSS: Flex course.
- Sign up for the Figma service. This will allow you to conveniently view the layout elements
- Open the Hero Section test layout
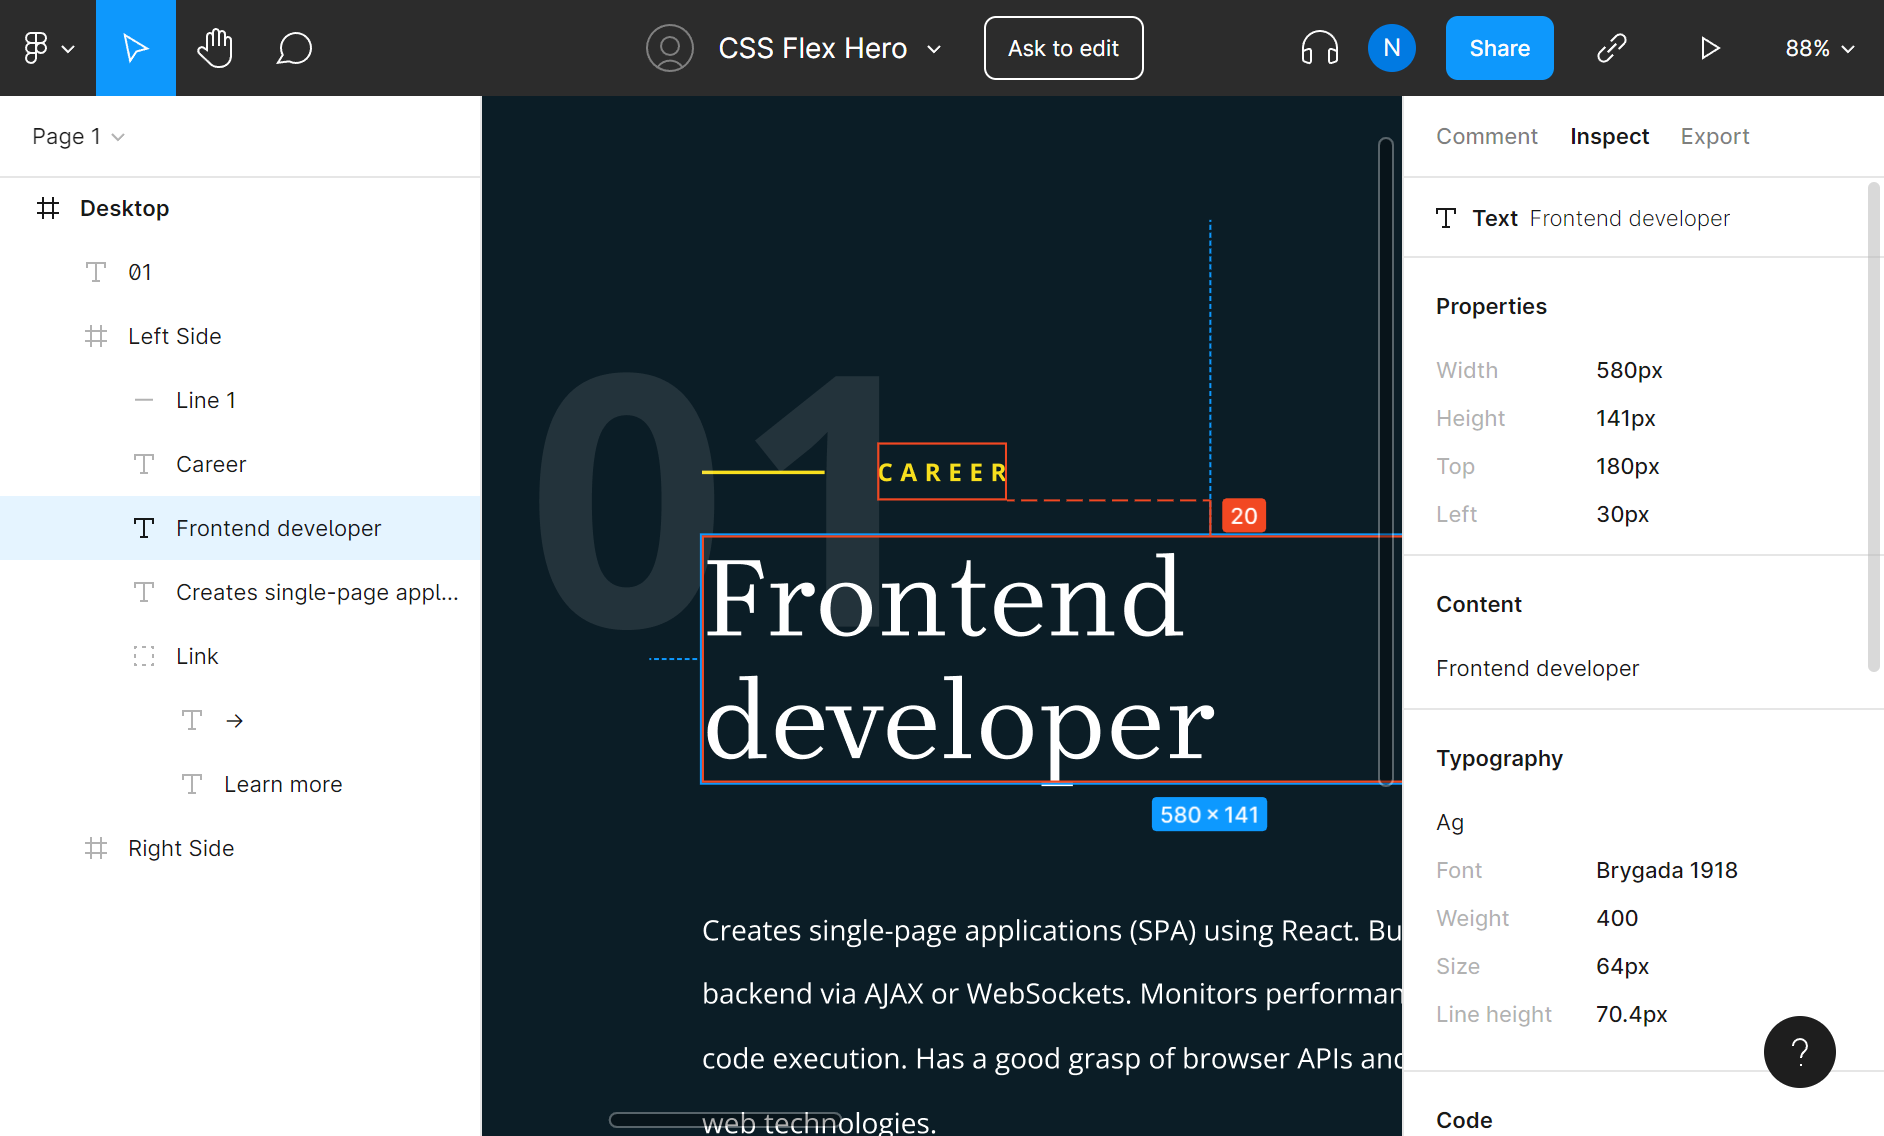
The Figma window can be divided into four functional areas:
Header
This contains various settings, the file name, and public link settings. If you create your own layout, the header will also contain tools for creating elements.

Layers
All of the newly added components to the layout are located in the left area. Text, geometric shapes, and images can all be used for this. Layers are the name for these components since the editor takes the placement of the elements into consideration. If you put the image above the text in the layers, it'll move on top of the text in the layout as well.
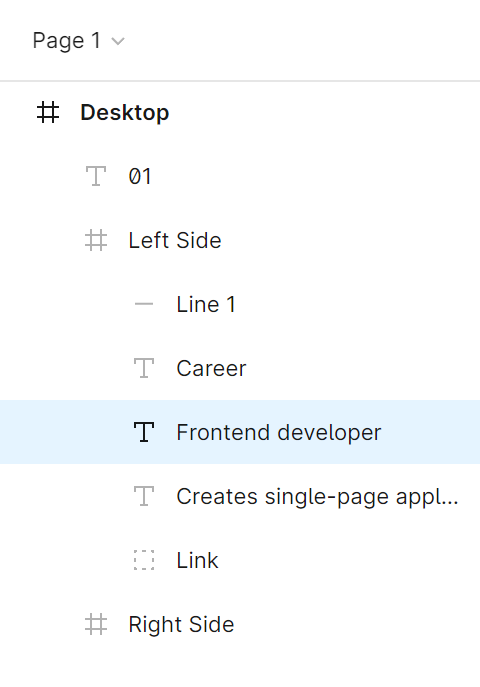
Layers can be combined into different groups. This makes it convenient to separate the layers of different parts of the layout. The Hero Section layout has the following groups:
- Left Side
- Right Side
Inspector
The most useful section for layout designers. The Inspector allows you to see all the settings for the selected element in the "Layers" section.
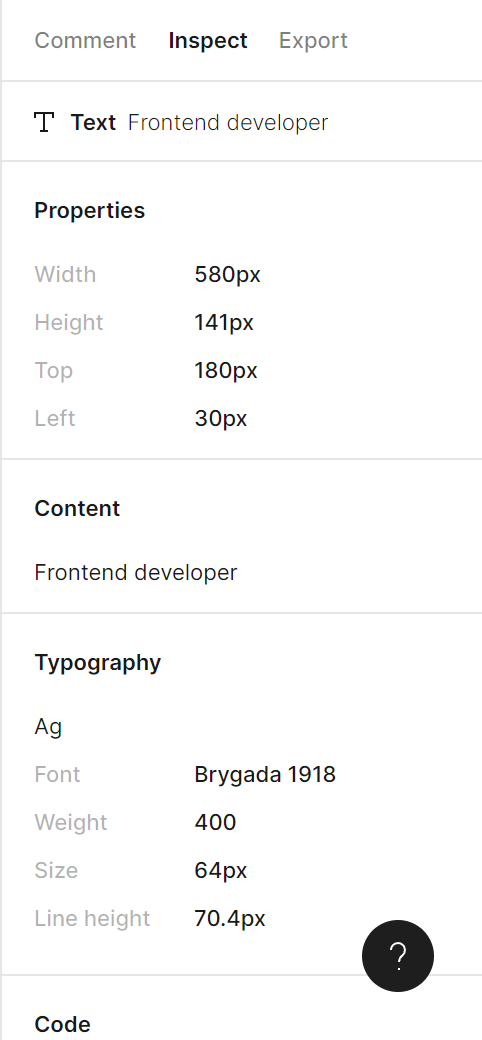
The text "Frontend Developer" is selected right now. What element parameters can you get? Let's see:
- Properties
- Text width:
580px - Height:
141px. Note that this is the value of the text, not the block that it's in topandleftvalues. These values are relative to the upper-left edge of the layout. Most of the time these values are useless, but there are situations where it makes sense to take a closer look at these values
- Text width:
- Content
- This is where the content is located inside the layer. This part is relevant to the text. If you click on the content, it'll be copied automatically
- Typography
- Font - the name of the font. This is defined by the
font-familyproperty - Weight - the thickness of the font. This is defined by the
font-weightproperty - Style - the style of the font. This is defined by the
font-styleproperty - Size - the size of the font. This is defined by the
font-sizeproperty - Line height - the spacing between lines. This is defined by the
line-heightproperty
- Font - the name of the font. This is defined by the
- Colors
- Here you can see the color of the element. You can click on it to copy the color value
- CSS
- Here is where the CSS for the selected element is generated. Do not rely on these values, since many properties are used incorrectly. For example, positioning values
Layout view window
The central area contains a visual representation of the layout. With it, you can select different layers with the mouse, as well as see the indentation between elements/
If you select the "Learn More" layer, press Alt or cmd for macOS, and hover over an adjacent element, Figma will automatically tell you the distance between the elements.
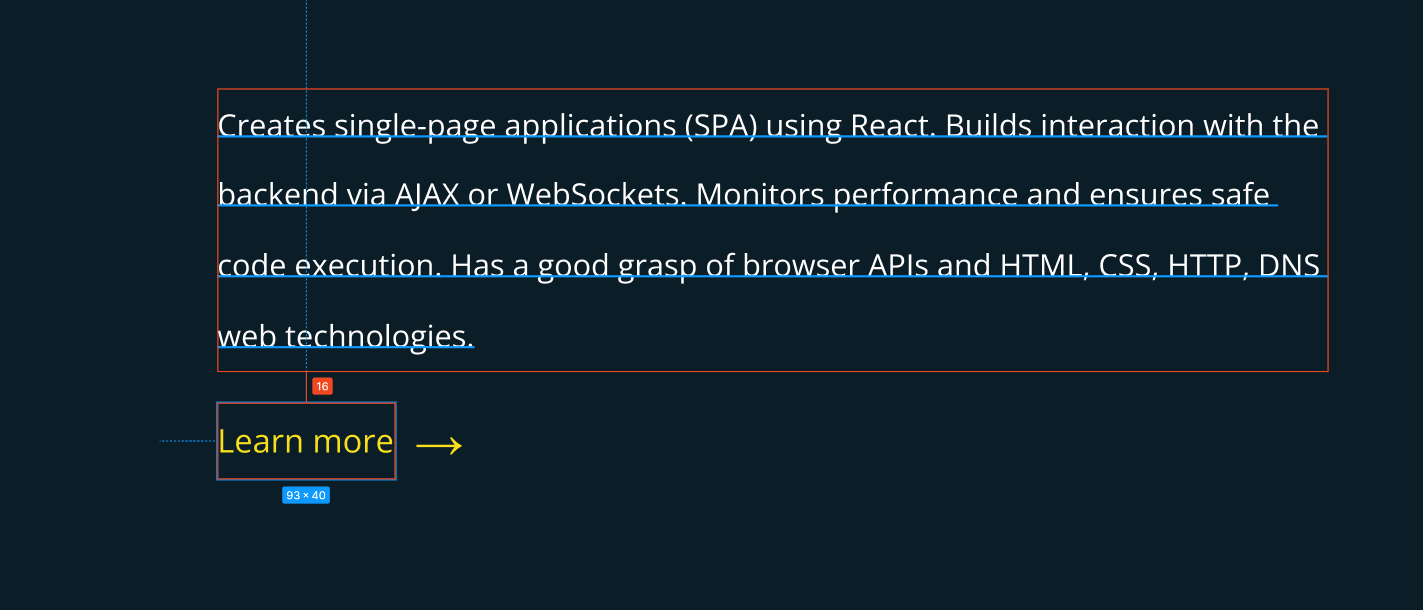
From this image, you can immediately recognize several element parameters.
- The size of the "Learn More" element is 127x40 pixels
- The distance from the text to the "Learn More" element is 16 pixels
Recommended programs
Completed
0 / 12
