Modern layout fundamentals
Theory: Chrome DevTools
When you design a site, it's vital we catch errors in time or understand how to properly convert the block we need. The more experienced you become, the more information you need to know about the site. This can be data on the network load, the weight of the site, and loaded images and scripts. All this allows you to control the operation of the site and, if necessary, to optimize it.
Previously this was done manually or using a variety of programs. The layout had to be written directly to the file, and only after saving would the result be checked. This is time-consuming because you can't track changes in real time and immediately see the changes you make straight away.
All modern browsers now have a web inspector function (developer tools). This is a set of different applications and inspectors, using which you can add styles and HTML code elements without changing the files. These web inspectors allow you to test the layout on different screen resolutions, which is essential when creating adaptive websites. This topic will be dealt with in more detail in the corresponding course.
In this lesson, we'll explore the basics of working with Chrome DevTools, which is built into the Google Chrome browser. The principles that'll be shown will also apply to inspectors in other browsers. They're all similar, so you shouldn't have any problems going from browser to browser.

There are two ways to open Chrome DevTools:
- Right-click anywhere on the page and select Inspect
- Use the key combination Ctrl + Shift + I or F12 for Windows and Linux, or Cmd + Opt + I for macOS
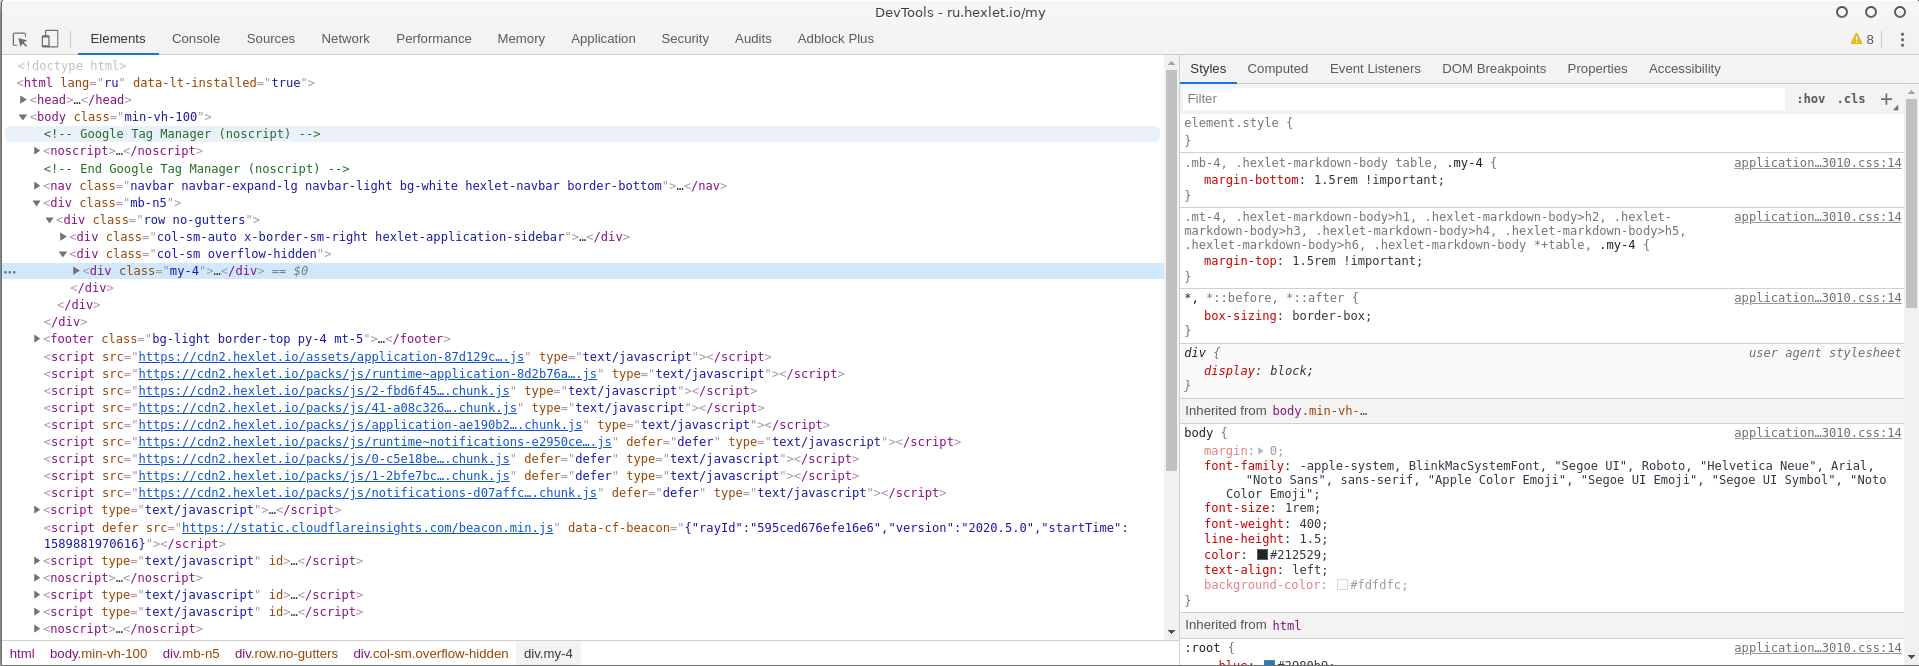
After opening it, you'll initially be taken to the Elements tab. This is the most important tab for beginners. The other tabs also carry a lot of useful information, but at this stage they're more likely to cause problems for you because they're quite specific. But let's briefly describe the purpose of each of the main tabs:
- Elements - all HTML and CSS code is shown here. In this lesson, we'll talk more about this tab
- Console - The Console tab allows you to look at JavaScript output and write your own JavaScript code to test and debug the page
- Sources - all downloaded files from all sources. This is a good place to track how much information you get from outside resources
- Network - here you can track everything that concerns how your site loads; files, their size, download speed, type of request to the site, its internal parts and so on. In general, any query that your website makes is displayed in this tab
You'll use these four tabs fairly regularly when you have an actual programming job. Progress does not stand still, and it's important to keep track of more and more different information about how the site operates.
Elements tab
Let's go back to the Elements tab. Conventionally, it's divided into two large groups - HTML work and CSS work. The HTML area is represented as follows:
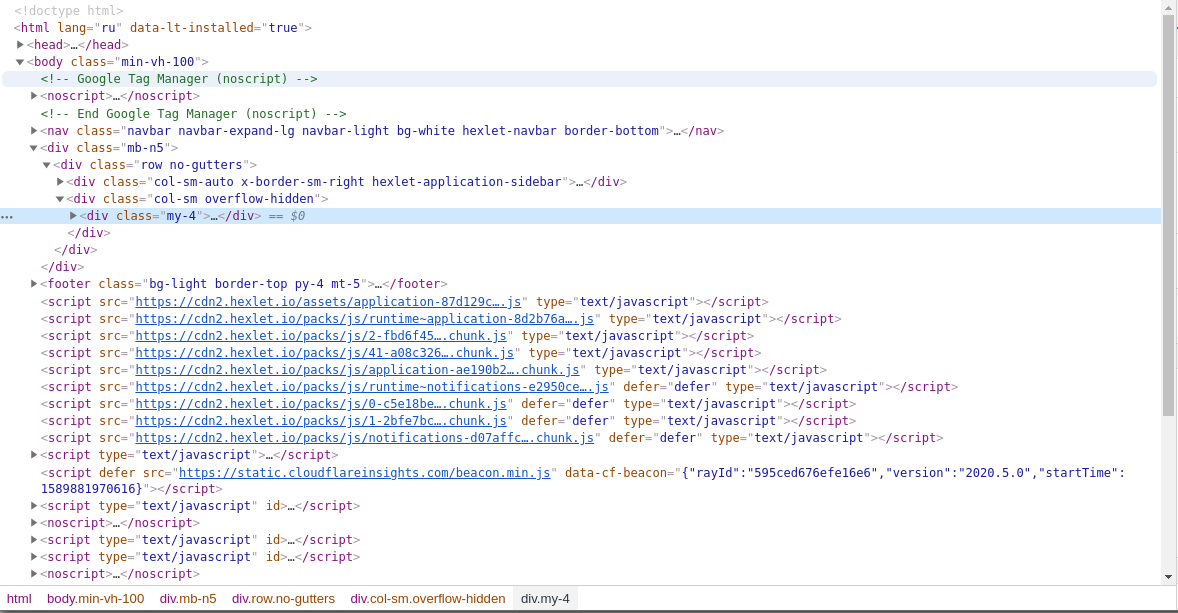
Open the panel on this page and try to expand the HTML tree. You'll see that all nested blocks are separated from each other by indents, which is very convenient because you can visually see the depth of the required block. If you click on any HTML, you'll see all the nesting with classes in the information line at the very bottom.
In the picture above, this nesting is as follows:
html body.min-vh-100 div.mb-n5 div.row.no-gutters div.col-sm.overflow-hidden div.my-4
It bears some similarity to a CSS selector. In fact, that's exactly what it is. If you give this line as a CSS selector, you'll select exactly the element you selected in the inspector. From the same information, it's easy to reproduce the structure of the blocks. In this case, it's like this:
Open the context menu (right-click) on any HTML element in the Web Inspector. You'll see all possible actions on a particular HTML element.
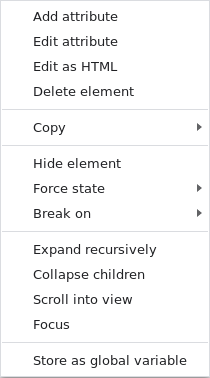
Let's take a look at the main points:
- Add Attribute - add any attribute to an HTML element
- Edit Attribute - change any attribute of an HTML element
- Edit as HTML - allows you to change the HTML. In this case, the block you selected and all the elements inside it will be available for editing. These elements are called children. And the block that you chose will be their parent. You'll see these two words very often when creating a layout
- Delete Element - removes an element from the layout
Note that none of these actions affect the markup files; they're on your computer or server. These manipulations are only available here and now. When the page is refreshed, all these changes will disappear. This allows you to quickly run experiments and see them in a real browser without having to edit working files.
The second area in the Elements tab relates to CSS.
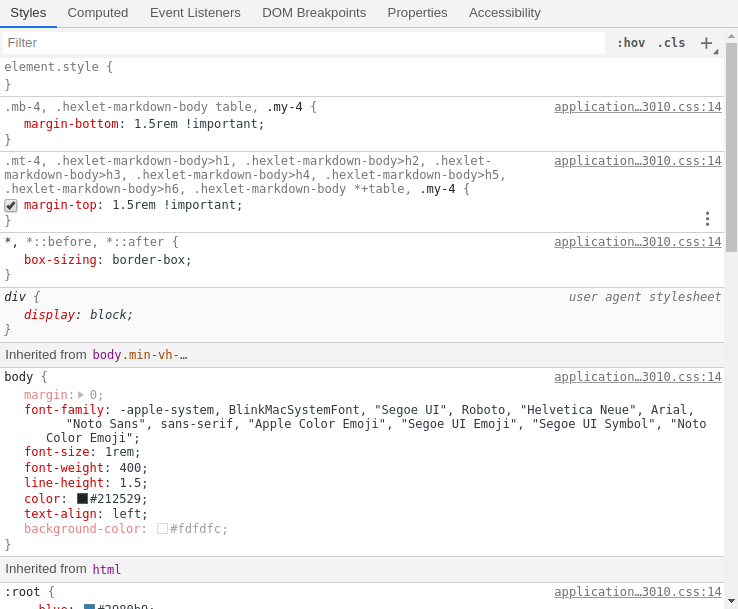
This is a fairly large area with various tabs. We're interested in the first two tabs:
- Styles - in this tab, you can view/edit/add styles for the element
- Computed - this tab contains all the styles that have been applied to this element. This is a clear illustration of how the CSS cascading principle works. Here you'll see not only the styles you gave for the element, but also those that were added to the element from inherited properties and the default properties in the browser. Also in this tab, you can see the block model of the current item. You can see everything that affects the height of the current element on it
Styles tab
First, let's look at the basics of the Styles tab. Outwardly, it looks as follows:
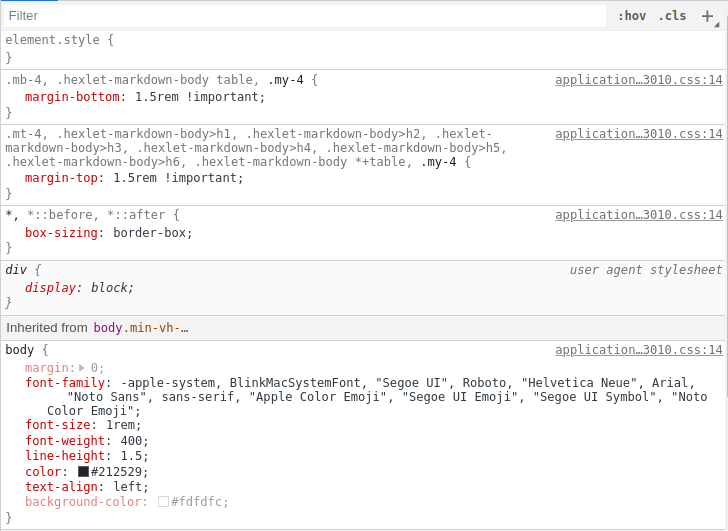
And that part can be broken down into several. Of course, it sounds complicated, but it's actually quite intuitive. In the top area, you'll see the styles that are directly applied to the current element. In our case, that's are the following properties:
- margin-bottom
- margin-top
- box-sizing
- display
These 4 properties with tag or class selectors are directly related to the selected block. The tool shows not only the properties, but also the selectors to which those properties apply. Thus, it's easy enough to find the right place in the CSS file. In addition, to the right of each selector is the file in which the selector is located and the line number in the file. This is convenient, provided that you don't use plugins that compress CSS to one line. In that case, this information may not help you.
Below these selectors, you can see the block Inherited from ... - In the example above, the styles are inherited from the body.min-vh-100 selector. At the same time, they highlight those styles that directly affect the element. The rest of the pale color styles are not inherited.
In this tab, we can not only look at the styles, but, as with HTML, we can also edit/add/delete styles. Try clicking on any value in this tab and the web inspector will prompt you to change it. It will also prompt you for available default values, which is very handy if you have forgotten a value.
Computed tab
Now let's switch to the Computed tab. It looks as follows:
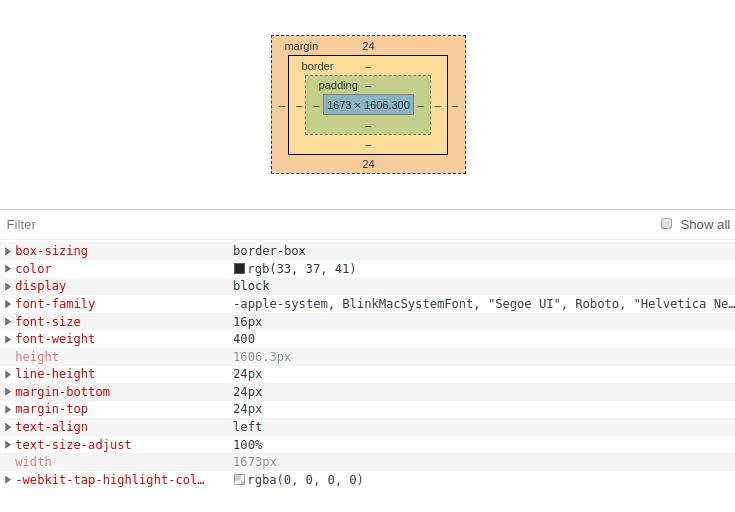
And it's divided into several main areas. This is the last one, promise :)
At the top, you'll see a visual representation of the block model of the selected item. It contains all the properties that affect the final size of our element.Let's remember them:
widthheightbordermargin- external indentpadding- internal indent
If you look at the example in this tutorial, you can see that the element now has a height and width, as well as a margin property of 24 pixels above and below.
The bottom area illustrates the principle of cascading in CSS. Here you can see a compilation of all the element styles. You can click on each property, and it'll give you the file and the line where the properties were applied to the element, and which selector added which property.
These are all the most basic things about Chrome DevTools that you should know at the beginning. If you try and write down all the possibilities, then you could make up an entire profession. Web inspectors are very powerful tools that are sure to help you at any stage of your development. It's also an indispensable assistant in real work. Always try to learn something new about these tools.
Recommended programs
Completed
0 / 12

