JS: Automated testing
Theory: Continuous Integration (CI)
Running tests locally is a personal responsibility. Good developers continuously test their code throughout development and make sure to run tests before pushing. (git push).
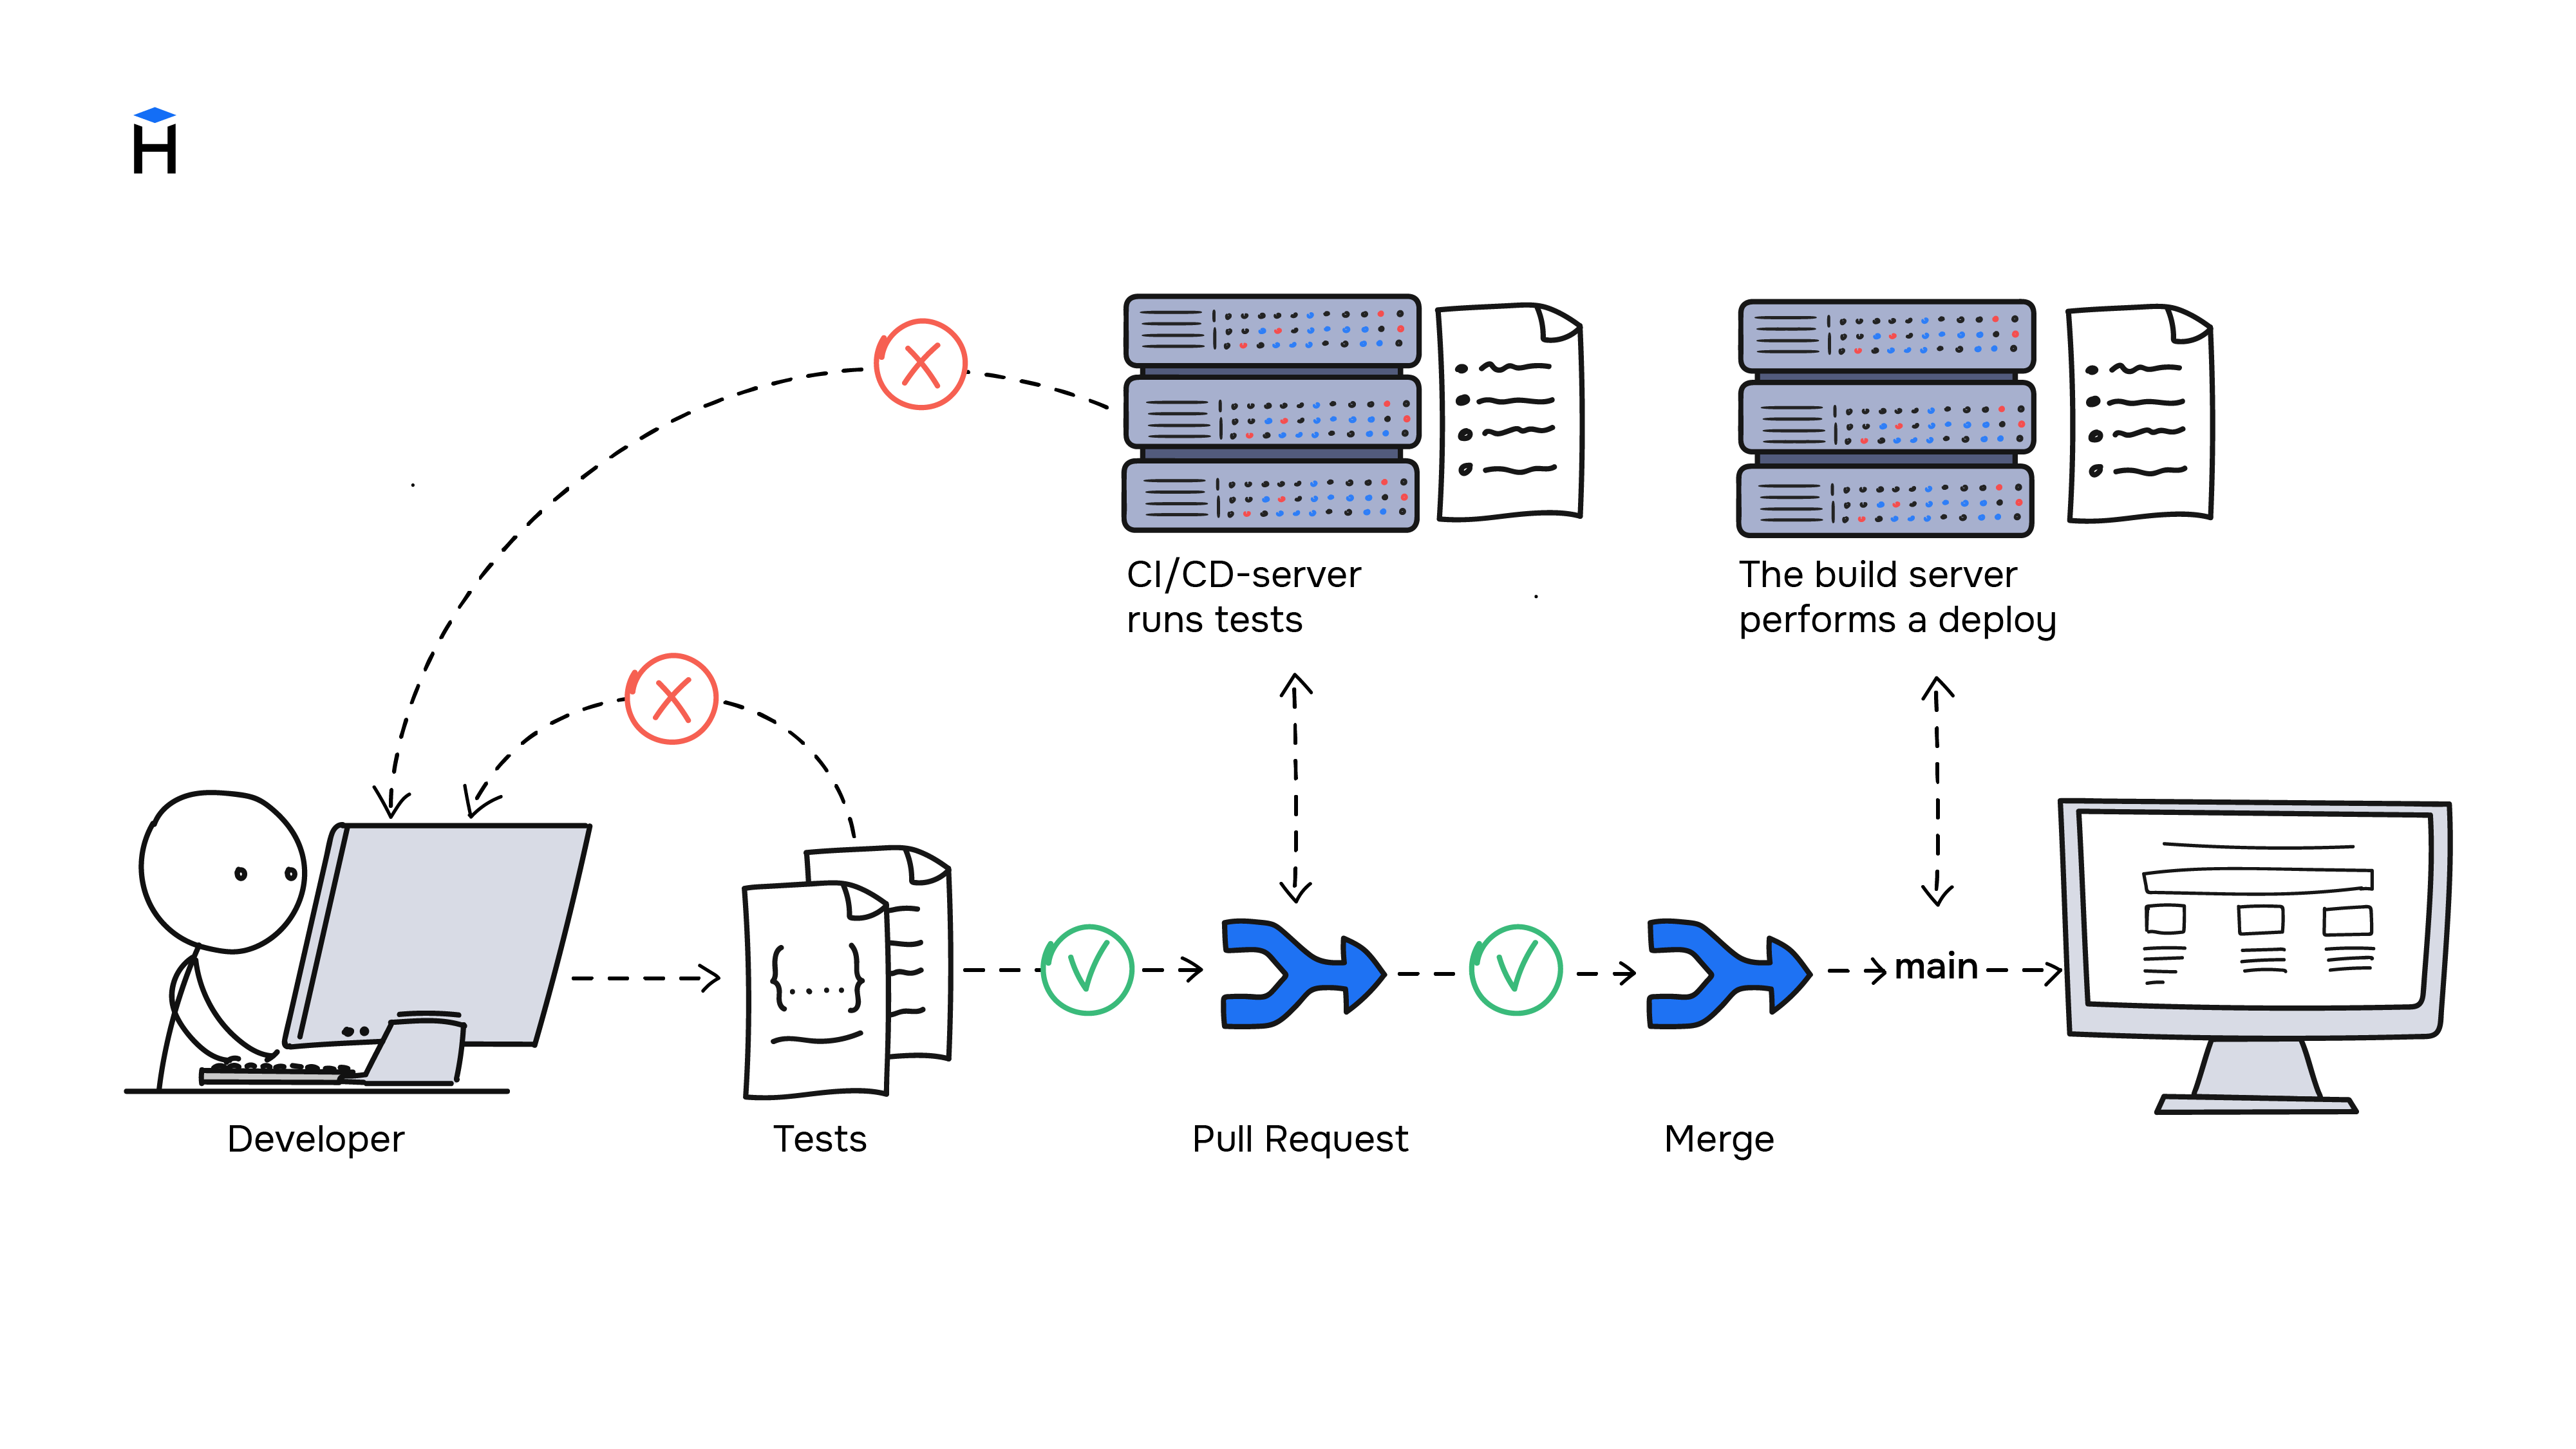
But that's not enough. Where there are people, there is human error. Therefore, even though the tests run locally, they should also run automatically on continuous integration servers.
Continuous integration is a development practice that involves regularly bundling the application automatically to identify problems quickly. Usually, integration performs on commits to the repository that is watched either by a special server or a continuous integration service. It loads the code, builds it (if needed for the current application), and runs various checks. What to run and how to run it is determined by the programmer. First and foremost, these are tests and the linter (which checks code layout). In addition, they can run utilities that analyze security, whether dependencies are necessary and more.

Here's a little terminology and a description of the process. A build is launched for each commit. During the build, the application is assembled, dependencies are installed, tests are run, and all the other checks are done. A build that's completed without errors is considered a success. If the build fails, the programmer will receive a report to fix build errors.
There are two ways to implement continuous integration. First, put yourself on a Jenkins server or equivalent. This option requires a lot of manual work (plus server support). It suits companies that have very complex applications or don't want their code to leak, or have so many projects that it's cheaper to run their own server than a third-party solution. The second way is to use a continuous integration service. There are dozens, if not hundreds, of such services. There's a lot to choose from. As a rule, most of them are free for open-source projects.
Github Actions
GitHub Actions is a free system that allows you to automate actions important to the development process. It provides continuous integration (but can do much more). Hexlet uses Actions in all of its open and closed projects (example). It can be used to run a certain code every time an event occurs.
For example:
- run the code check with the linter and tests
- deploy the code to the server
- send notifications to the messenger about events in the repository (new issues, PR)
- and more
In this tutorial, we'll go over the basic concepts of the system and then look at an example of setting it up to get you up and running quickly with Actions in your repository.

For convenience, GitHub Action provides a badge, an image that's inserted into README.md. It shows the current status of the project (whether the last job was completed successfully or not), and by clicking on it, you can see the page with the job results.
Basic concepts
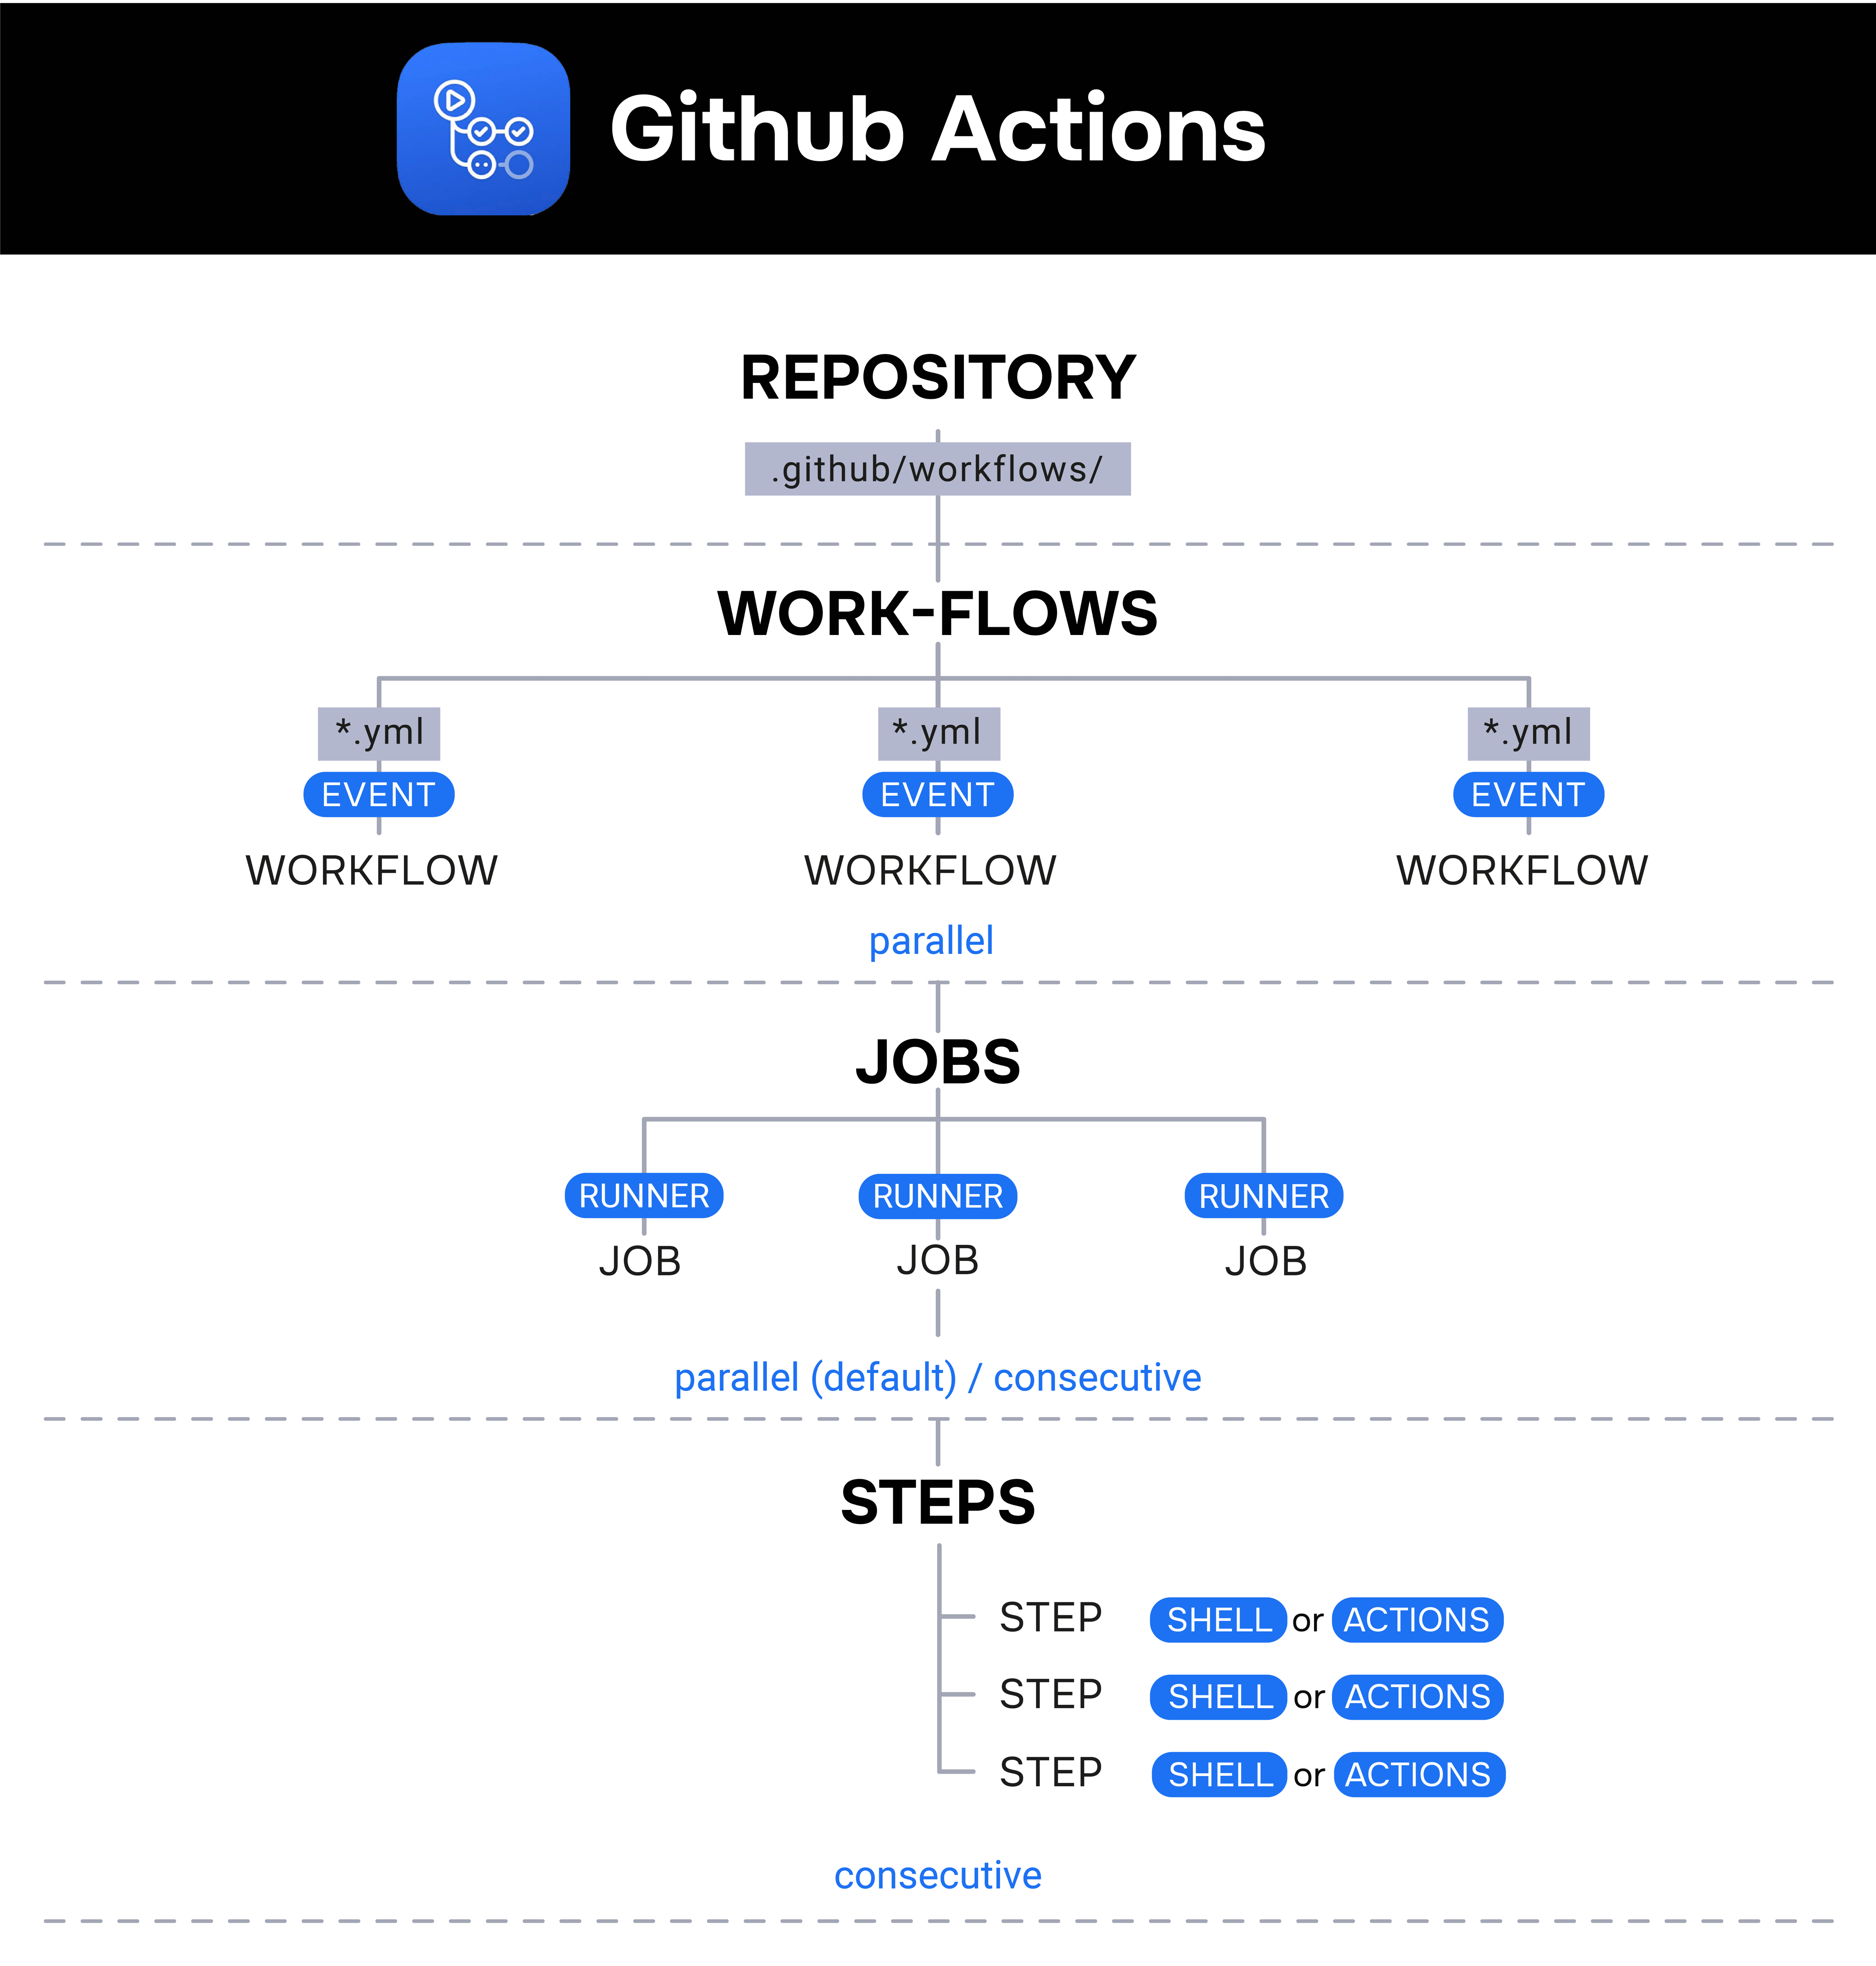
Let's start with the basics. The image below shows the basic concepts of GitHub Actions. Let's break them down in order.

-
Workflows
Each repository on GitHub may contain one or more workflows. Each workflow is defined in a separate configuration file in the .github/workflows repository directory. Several workflows can be performed in parallel.
-
Events
A workflow can be triggered by one or more events. These can be internal GitHub events (such as push, release, or pull-request), scheduled events (ones that are triggered at specific times, such as cron), or arbitrary external events (triggered by calling the GitHub Webhook API).
-
Jobs
Workflows consist of one or more jobs. A job contains a set of commands that are run along with the workflow. By default, when you start a workflow, all of its jobs run in parallel, but you can define a dependency between them so that they run in sequence.
-
Runners
Each job is run on a specific runner - a temporary server on GitHub with a selected operating system (Linux, macOS, or Windows). There are also standalone runners, that allows you to create your own environment to run the action.
-
Steps
Jobs consist of a sequence of steps. A step is either a shell command or an action. All job steps are performed sequentially on the runner associated with the job. By default, if a step fails, all subsequent steps of the job will be skipped.
-
Actions
Actions are reusable blocks of code that can serve as a job step. Each action can take parameters and create any values, to be used in other actions. Developers can build their own actions or use those published by the GitHub community. There are about a thousand generic actions, all available on the GitHub Marketplace.
An example of a workflow. Hello, World!
This workflow doesn't do anything special - it just displays the phrase Hello, World! in the standard runner output whenever code is sent to the repository. This is what the code of this workflow looks like:
Let's break it down in detail:
- The name of the
hello-world, workflow, which is defined by the name field - The workflow is launched by the push event, which is defined by the on field
- The workflow contains one job with the identifier my-job — it contains the name of the job
- The
my-jobuses theubuntu-latestrunner from the GitHub Marketplace - it is defined by the runs-on field - The
my-jobjob contains one step namedmy-step. This step executes the shell command echo — in our case it's "Hello World!"
You can find all of the syntax elements for defining workflow on the workflow syntax help page in the GitHub Actions documentation.
The practical use of this workflow is minimal, but it's necessary for training. Let's try to integrate it into the repository on GitHub. First, you need to create a directory in the .github/workflows repository, and then copy the above code into it, then save and submit your changes to GitHub.
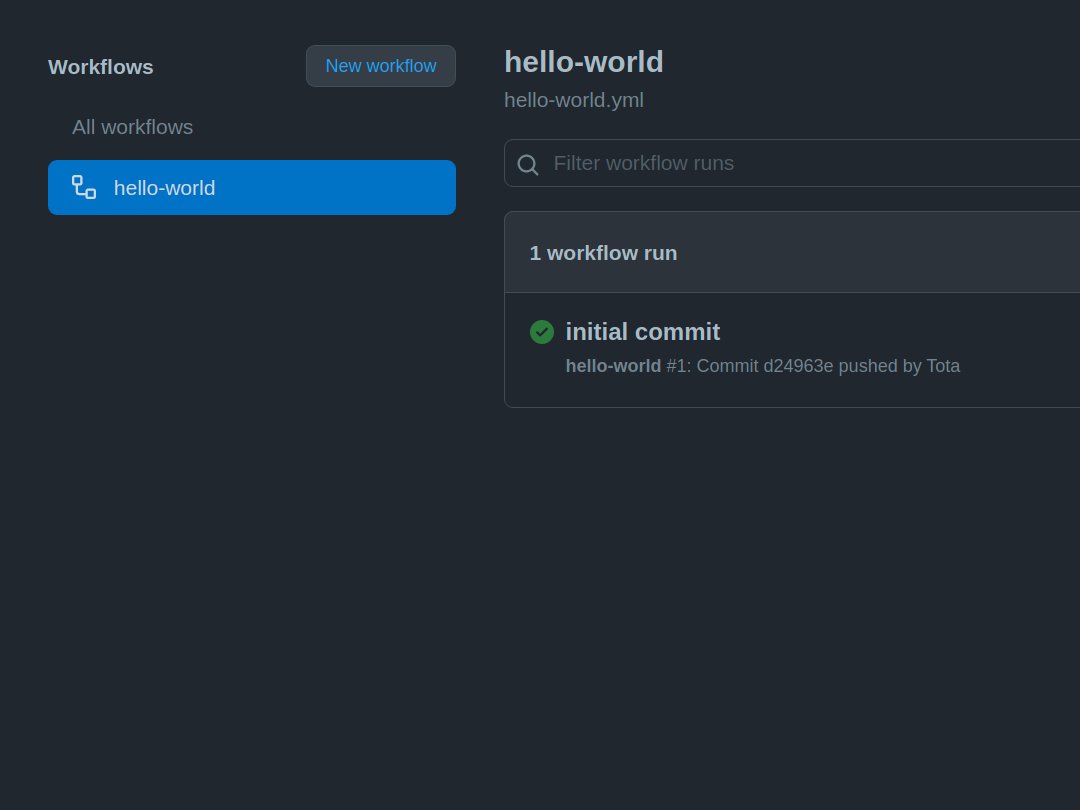
Then go to the actions tab and look for “hello-world” in the list of workflows on the left side of the screen. This workflow is triggered by pushing—information about this is shown on the right side of the screen.

Now, every time you push to the GitHub repository, this workflow will start automatically, and information about it will appear in the upper-right part of the screen.
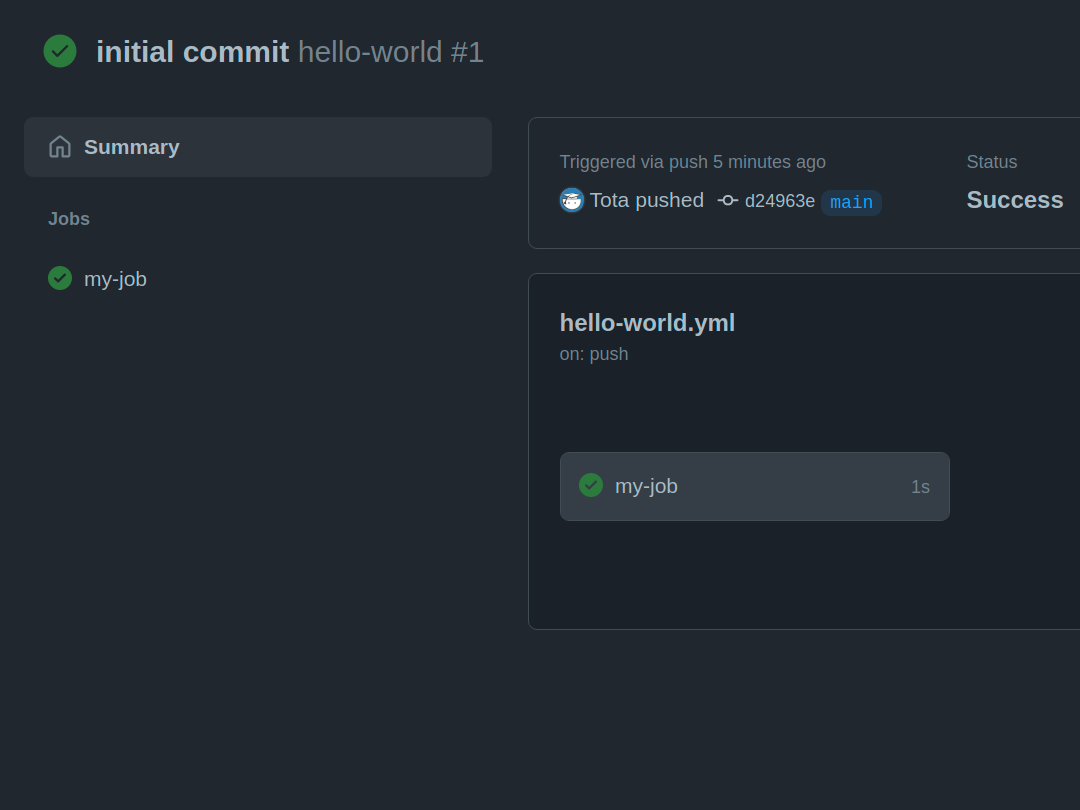
If you want to check if it's run correctly, open the notification – a new screen will show you all the jobs in the workflow, and when you click on my-job, you'll see all the details of the jobs.

The process consists of three steps: set up job, my-step, and complete job. The first and last are added automatically, and my-step is defined when you create a workflow.
You can click on each step to get more information about it:

That's it – you've just created and launched your first workflow in GitHub Actions.
Don't stop there, this workflow can be adapted for whatever you need. For example, if you're doing a project on Hexlet, you can make the Makefile commands run on every push to GitHub.
Conclusion
In this lesson, we learned the concept of continuous integration, the basic concepts and terminology of GitHub Actions, and how to set up a simple workflow.
It's not possible to cover all the features of GitHub Actions in this lesson, so keep working using the documentation for help.
Recommended programs
Completed
0 / 12

